The development of the structure of the house begins with creating planes in order to hold the images of the Guildhall hall. This image is what was used in order to align the segments of the walls with.
The main structure of the house is created from boxes. These boxes are then welded together by cutting through sections of the polygons so that each of the boxes can be welded together. This structure is used throughout the entire modelling process to create the structure of the walls, rooms and doorways etc.
Creating the planes:

Creating the walls:

Welding the walls and dragging out edges. Using the border and holding down shift key enables me to pull out walls and adjusts where necessary:

Making doorways:

After sometime spent of modelling parts they can now be implemented into the rooms of the house:

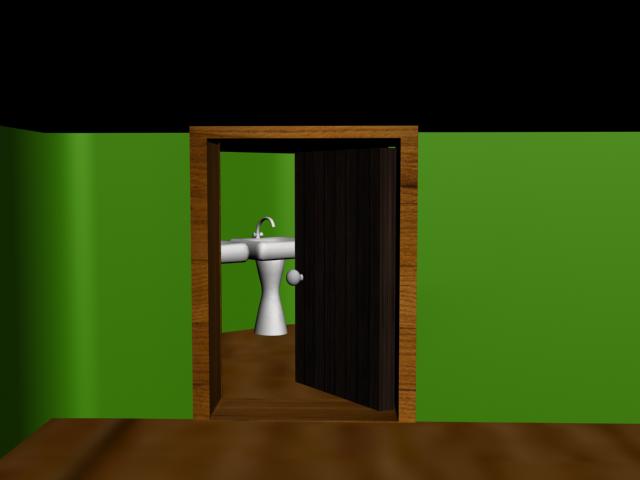
Below in the images you can now begin to see the development of the toilets and the bathrooms:

Now the doors can begin to be installed into the doorways. This allowed me to see where things were going to be structured and how much room I would have in each of the rooms. Doors and there housing were duplicated using the shift tool. This is the same process used for all of the objects that required duplication.
Now i had created this part of the modelling building struction it was now time to begin to create the development of the final project building model. This meant pulling the walls into the correct scale and developing the rooms to become seperate objects. This process was done by selecting the polygons in each of the rooms and using the detach tool in editable poly mode so I could seperate each of the polygons. This meant that I could now apply seperate wall papers to each of the walls and modify them individually.
Each of the rooms were named so that they could be selected using the select by name tool within 3ds max when necessary.
Using the move, rotate and scale tools and mainly editing in editable poly mode with polygons, edges and vertex points, the walls and rooms slowly progress into a completed project structure. Now the main features such as lights and furniture could be added to the building the begin to become closer to the animating stages of the project.
Upper Floor Modelling Stages:
Left Side -

Main Hall -

Right Side -

Underside -

This is much further into the development process of the upper section of the house. After creating all of the modelling on the objects they can now be implemented into the structure of the house. Bitmaps are now applied to the walls and flooring and all of the objects to give a more realistic look.
These sections below are taken from the NEW Guildhall Building -
Upper landing of the House:


Upper stairways, right section of building:

New Kitchen:

New Bathrooms:


Stairway:

No comments:
Post a Comment